Use custom fields to define the key additional data you wish to collect about each prospect.
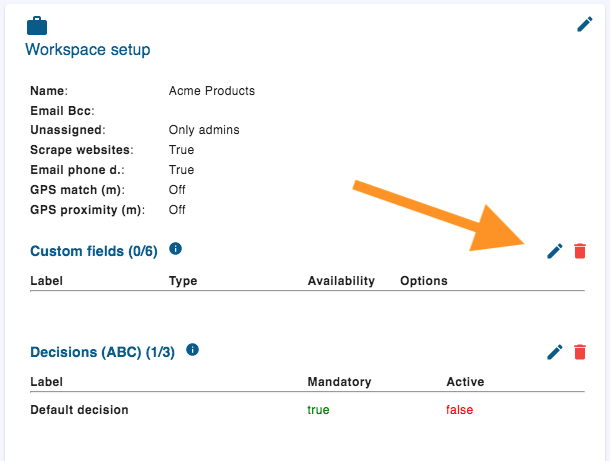
Click the edit icon next to Custom Fields in the Workspace Setup section in Settings:
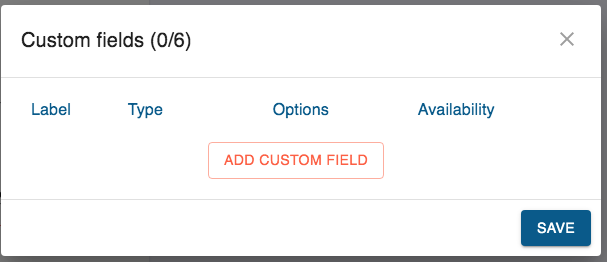
In the Custom Fields popup you can edit your existing custom fields or click to add a custom field. You can add up to 20 custom fields.
You can choose from 7 field types:
- Text
- Numeric
- Multi-text
- Select/Radio
- Checkboxes
- Text with default options
- Numeric with default options
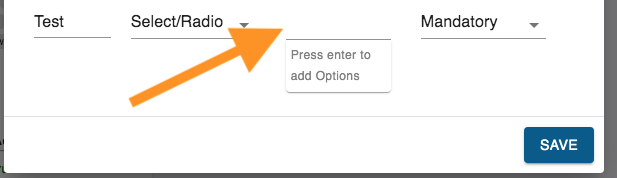
Checkboxes allow multiple choice of pre-defined text items. Multi-text allows multiple entry of entered text items. All other types allow a single choice or entry only. You define the options for Select/Radio, Checkboxes and default text and numeric options by entering them above the line:
Finally, select the custom field behaviour:
- Mandatory fields are included in the decision bar. When data is added in the decision bar, the next mandatory field is shown. When all decision bar data is complete, the next prospect is displayed.
- Restrict Edit fields are displayed, but edited only by the Admin, via API or Upload.
- Restrict View fields are not displayed in the Prospect View. They can be edited only by the Admin, via API or Upload.
Here is an example of a completed custom fields setup:
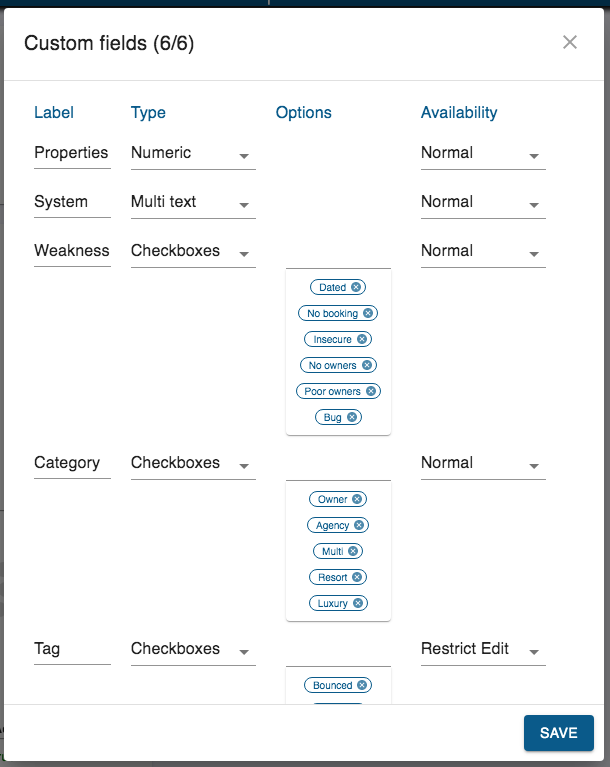
Scroll down to see the remaining fields.