By integrating your email account you can send emails direct from ProspectSafari by simply clicking a contact’s email address. Within the send email popup you can then include shortcodes within the email body or alternatively select a template to send. You can also enrol the contact in a Sequence.
To integrate your email you simply need to setup the SMTP username and password in the Integrations menu.
You may need to adjust settings in your Microsoft 365 account or your Gmail account first. See the Email Integration article for further details.
You can add different signatures to be used and manage your various “send as” email addresses.
First, select the Integrations menu:
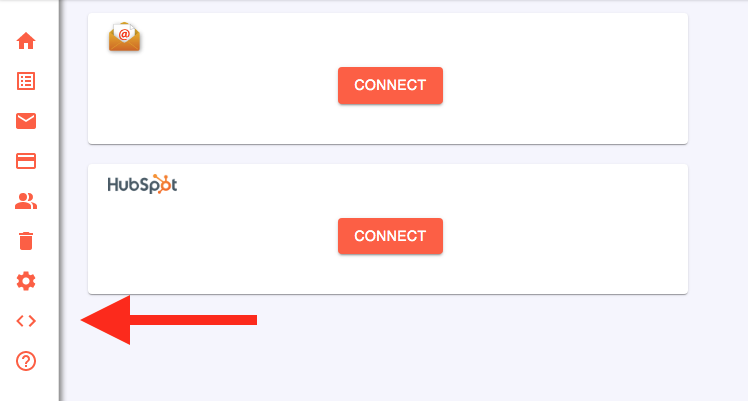
Then click to connect your email account.
The first step is to connect your email by adding the SMTP coordinates. In Integrations, click to connect your email and add a set of SMTP coordinates. You will see this popup:
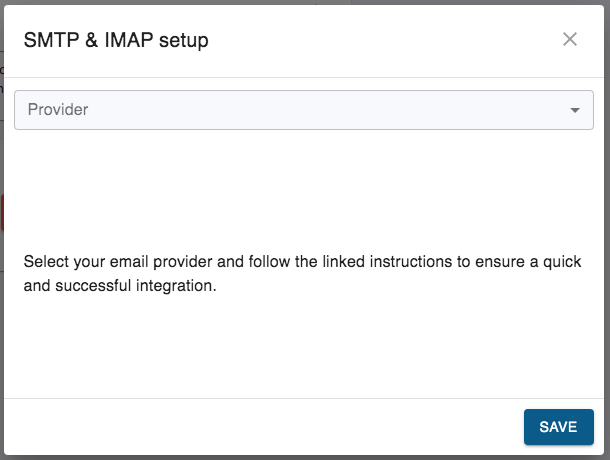
Choose your email provider and enter the required information:
Gmail
First, you must setup 2-Step Verification on your Google account. Do this is the Security section of your Google account (go here).
When 2-Step Verification is ON, go to: https://myaccount.google.com/apppasswords
You will see the following screen (once you have created an app password it will be listed as shown below) and you should click on “Select app” :
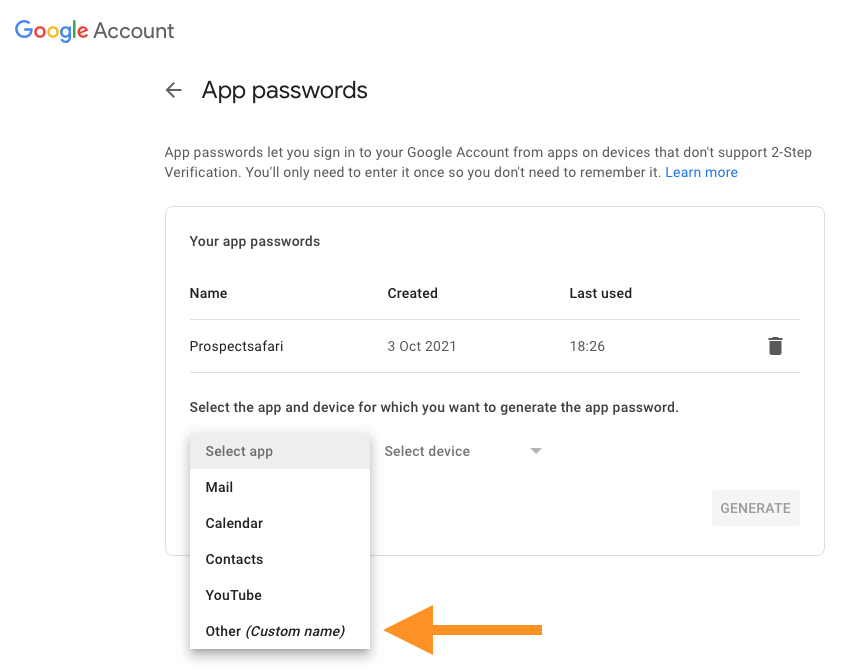
Select “other” and type in “ProspectSafari” and click the Generate button. Copy the app password and paste it into the ProspectSafari SMTP & IMAP setup form, together with your gmail account address:
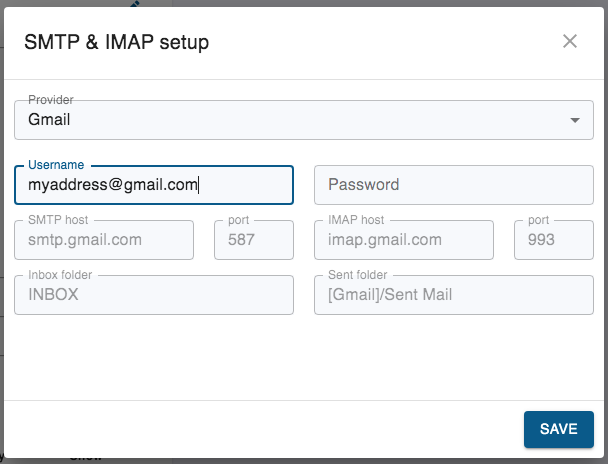
Enter your gmail address as username and the newly created App Password (do NOT enter your actual google account password).
The following variables are already set:
- SMTP host: smtp.gmail.com
- SMTP port: 587
- IMAP host: imap.gmail.com
- IMAP port: 993
- Inbox folder: INBOX
- Sent folder: [Gmail]/Sent Mail
Your gmail account should now be integrated.
NB if you change your google account password, you will need to generate a new app password for ProspectSafari and enter this new password as above.
Outlook
Select Outlook as your email provider and click on the login button:
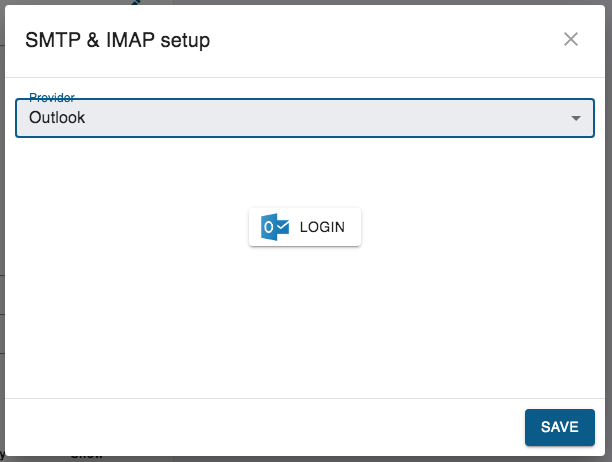
Depending on how your Outlook account has been setup, you will probably need to change some settings: See the Email Integration article for further details.
Generic
Check with your email administrator to find the SMTP and IMAP host details.
Email Addresses
Here you can add all the “send as” email addresses from your integrated email account that you wish to use to send mail from ProspectSafari. If you only have one “send as” account set up then that should be entered here. Click on the edit icon in Email Addresses and you will see this popup:
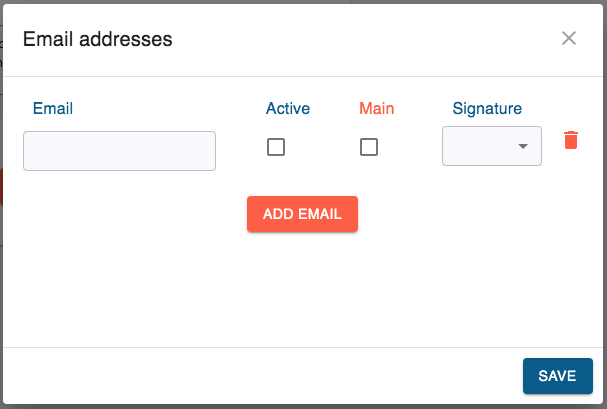
Select Active in order for this address to be selectable in the create email popup.
The Main address is the default.
Select a signature from those added in the Email Signatures section (below).
Now when you click the email address of any Contact the send email popup will open. You will be able to choose any of these “send as” addresses and the signature will be automatically appended when it is sent via your connected email account. The text of the email will be added in the timeline.
Email Signatures
You can create multiple email signatures. To add a signature click the + icon in the email signature section. You will see this popup:
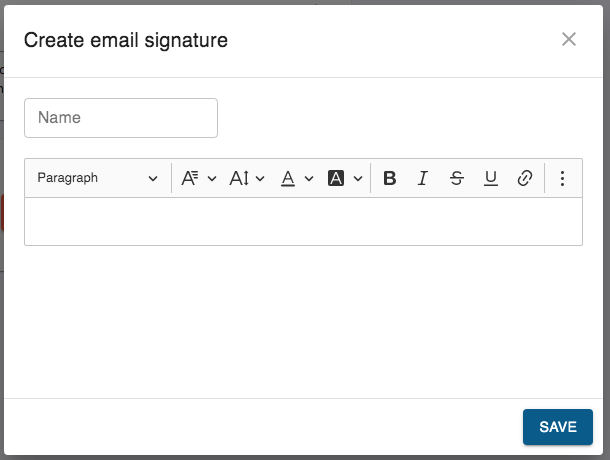
Enter the name of the signature and then either paste in the required formatted text including logo images or banners, or type it in. Click save. In the Email Addresses section (above) enter the name of the signature you wish to use for each “send as” email address.
Email Labels
ProspectSafari will regularly check the inbox and sent box of your connected email account.
Any and all emails to or from any contact in your ProspectSafari workspace will be copied and added to your ProspectSafari timeline. Older emails sent or received before your email was connected or the contact email was added will not appear in the timeline.
In addition, emails added to the timeline will also be tagged with a label in your email account so that you can filter your mailbox as you see fit.
Here you can define the labels that are to be used and the behaviour of your email account.